OVERVIEW
Actionabl.ai is a platform that automates your business processes and alerts users whenever human intervention is needed. To get started, your team will work with Actionabl to define the business processes, artifacts (documents and records), and workflows. The Actionabl team (or your IT team) then implements those processes and artifacts into the platform on your behalf and then tests that implementation with your team. When you begin using the platform in production, it’s pre-populated with your data and process – all you need to do is respond to alerts and (if you’re an admin) make minor adjustments.KEY CONCEPTS AND TERMS
Alerts
Actionabl alerts users whenever a process needs human intervention. This happens in two cases:- A step in the process that cannot (or should not) be automated. For example, one of your vendors may require payment using a non-standard method such as a physical check, or a printing process might need an expert to review and sign off on a proof. This also includes quality checks and review steps.
- An error in an automated step. For example, automation reconciles a vendor’s invoice against your purchase order and applies specific business rules; when the invoices fails reconciliation, your invoice manager needs to review and investigate before payment can proceed. This case also covers when something goes wrong, such as Actionabl not getting a response from an integrated system or encountering a missing document in a task step.
Users
User Types
The Actionabl system has two user classifications: Business and Technical.-
Business Users handle tasks such as quality assurance, offline process steps, and issues related to the “content” of your business process. They are generally not in charge of managing a function or technical component of the system.
Examples: Accounts receivable associates, production coordinators, customer support representatives, sales team, and quality assurance specialists.
-
Technical Users monitor the operation of the processes and the system itself and respond to errors that indicate something may not work correctly. For example, they resolve error codes or investigate the lack of a success response from an API call. Technical users may also take a proactive role in configuring parts of the workflow or user notifications.
Examples: Process managers, system engineers, manufacturing plant managers, and system administrators.
User Groups
When your administrator sets up your login, they assign it to one or more “groups” in the system. Your group assignment sets the boundaries for what you see by default and what you can access within the system. Your group helps you avoid noise associated with tasks that don’t relate to your role. For example, if you are in the Accounting group, you won’t see tasks or alerts relating to manufacturing processes.Departments
Your team may also use Departments to group users and manage their permissions. Departments, like groups, are granted the rights to certain assets in the system. They can also be used for notifications through a shared email address like “[email protected]” or “[email protected]”.User, Group, and Department management is covered in detail in the User Management Guide
Dashboards
The Actionabl platform has two primary user dashboards: Task Master and Controller. An Admin dashboard is also available only to admin-level users; its use is covered in the System Administration guide. Certain users have access to specialty dashboards for Design (process design, component design, control center, and admin controls) and Automation Builder, Accelerator, and Dev Tools, which are documented in their individual user guides.Task Master
The Task Master dashboard clearly focuses users on the tasks flowing through the workflow. It alerts users to any action needed to resolve an error or complete an offline business process. Task Master is organized into modules for each type of task (user, error, etc.) and has robust search and filtering capabilities. It also has the “My Tasks” module, where a user can access all tasks that are assigned to them.User Types: Business and Technical Users
The Task Master dashboard and functionality are covered in detail in the Task Management Guide.
Controller
The Controller dashboard manages workflow elements such as scheduling and task configuration. It also contains reporting, analytics, and a module for accessing and resolving Error Reports. Like Task Master, it offers robust searching and filtering.User Types: Technical Users
The Controller dashboard and its functionality is covered in detail in the Controller Guide
Process View
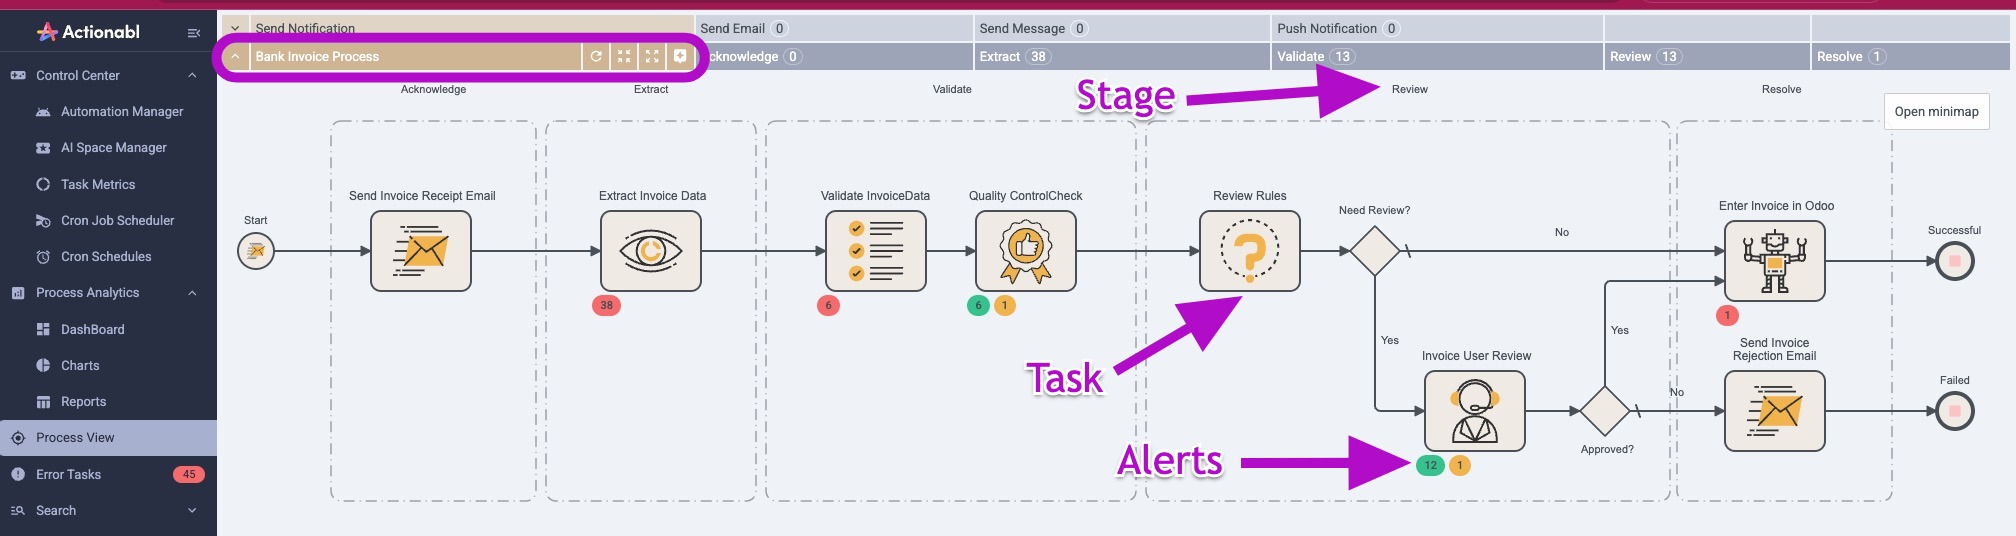
The Process View is a special way of looking at a workflow and its components like stages and tasks. A process is a complete end-to-end workflow that accomplishes a set of goals. Here’s an example:Bank Invoice Process
The Bank Invoice Process starts with receiving an invoice from a vendor, extracting its data, validating that invoice against purchase order data and a set of business rules, sending it for possible user review by the Accounts Payable team, then recording it in the accounting system or sending a rejection email if it doesn’t meet requirements
Extract Stage
The Extract stage takes the invoice document and runs it through OCR to pull the relevant data, organize it, and save it for the next step in the process to use
Validate Stage
The Validate stage then compares that data to a set of business rules to ensure it matches what was ordered, what you agreed to pay, the status of the items ordered, and so on. If discrepancies are found, this stage might include a human quality control check on the invoice.
Validate Invoice Data Task
The Validate Invoice Data task in the Validate stage looks at the total amount, items, and quantity data from the invoice and compares it to the data in the purchase order sent to the vendor. If it matches, that task is complete, and the process moves on to the next step. If it doesn’t match, the task creates a new QA Task for the accounts payable team to resolve.
Details of how to build and manage process models and their components are found in the Process Administration Guide.
Tasks
Within Actionabl, tasks can have the following types:- Decisions: Assess whether a condition has been met so the next step in a workflow can be performed, like checking whether an invoice amount is greater than a certain threshold to determine whether the invoice needs Accounting review.
- User: A step that must always be completed by a human, like reviewing a proof or shipping a sample.
- Quality Control (QC): A task whose output must be double-checked by a human, like issuing a payment to a vendor.
- App: Action taken by a third-party application, such as sending an email or creating a PDF file.
- OCR: Optical character recognition to extract data from a scanned document. For example, reading a scanned paper invoice and putting that data into the database.
- RPA: Robotic process automation that allows the software to mimic a human that is using web or desktop applications, like having the system update Quickbooks Online with invoice details.
- Machine Learning: Tasks executed by specialized apps like face or voice recognition or text classification.
- Bot: Automated, repetitive tasks like scheduling data backups or running a process at the same time every day.
- Rule: Checking the content of a process or document against business rules to determine the next action or update another field’s contents. For example, checking an invoice to see if it exceeds a certain monetary threshold for that vendor that might require additional human oversight.
- Sub-Task: A task started within another task, like looking up a recipient’s full name to include while generating an automated email.
-
ERROR: A system-generated task alerting a user to a failure to process a step correctly within the workflow.
Examples of tasks:
- Extract invoice data. Receives a PDF of an invoice and extracts the data from it. (Automated)
- Validate invoice data. Compares the extracted invoice data to the business rules to determine if it’s correct, complete, and ready to process. (Automated)
- Quality control check. Shows an accounting user a proposed vendor payment and its backing documents to determine if it is OK for payment by funds transfer. (QC)
- Resolve routing block. Alert production that no manufacturer is available for the items in an order so they can manually route or cancel the order. (User)
- No response from API. Alerts production that an order was sent to the vendor’s API, but the system did not receive a success response. (Error)
Working On Tasks
For most users, the primary activity in the system is working on and resolving a task.Alerts
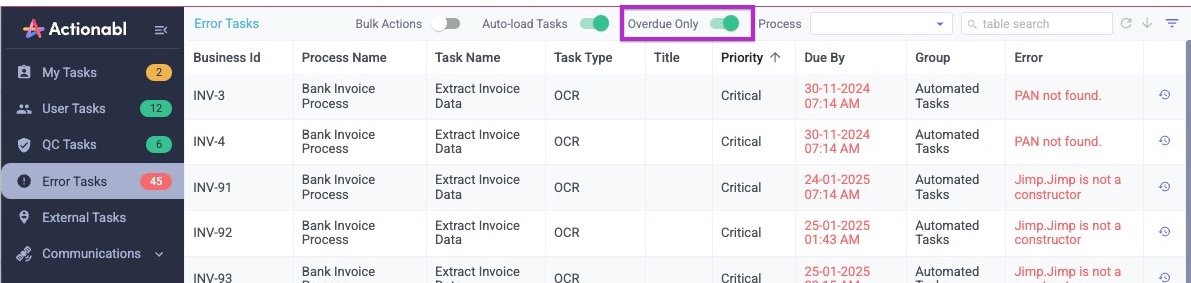
When a process encounters a step that requires human intervention, it creates a task alert. That alert is then shown to all users whose Group allows them to see it. The number of alerts is shown in the colored banner to the right of the module’s name. Click the module name to see the list of alerts.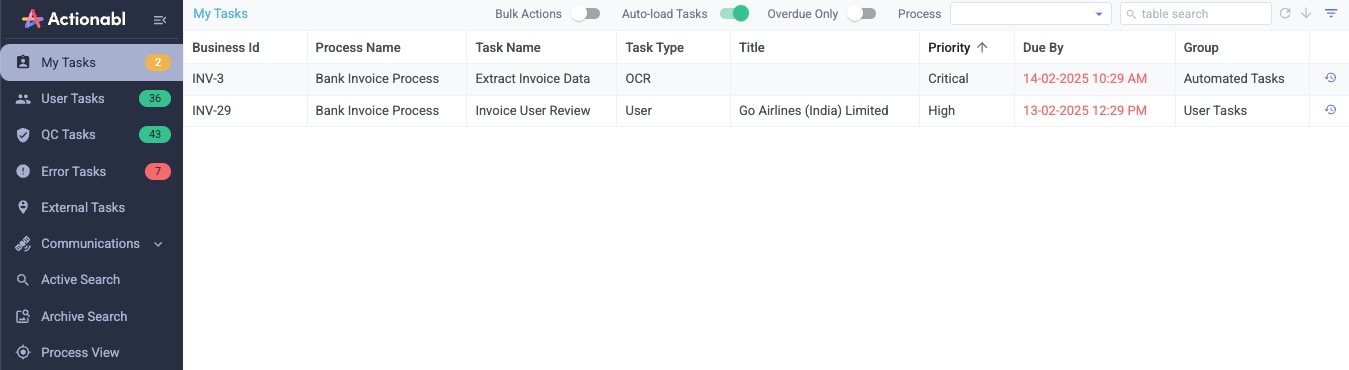
Task Details
Click any task in the list to open the Task Details view, which will show you all of the task’s data in the system.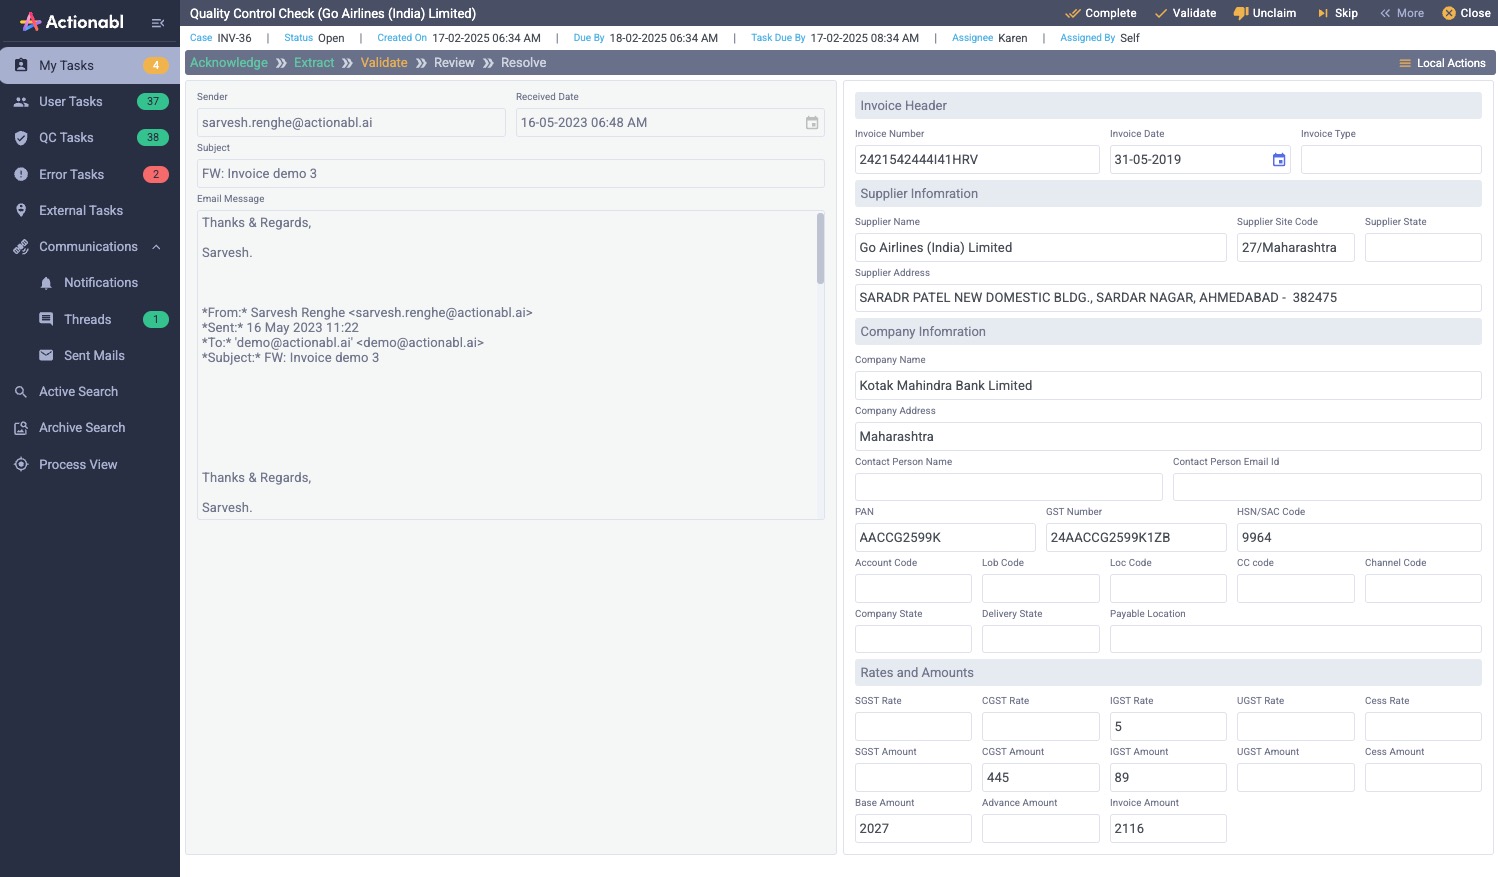 At the top right of the Task Details view, you’ll see the list of actions (such as Complete, Validate, and Claim) available for that task. This list is governed by:
- Your user group and role
- The task’s status
- Business logic rules
Claiming and Unclaiming a Task
To work on a task, you must first own it. You can Claim a task for yourself, or a manager can Assign a task to you. Once you own a task, it will appear in your My Tasks module at the top of the dashboard.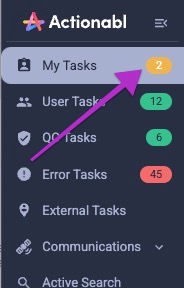 When you view a task that you own, you can take specific actions with it.
- Edit the task.
- Complete the task to save and close out the task’s action (including any changes you may have made). This indicates that all steps required for the task are complete (without further verification), so the task moves to the next step in the workflow.
- Validate the task to check its input data (including your changes) against the business process rules of this step to see if everything is correct and will process without error on resubmission. It does not save and complete the task or move on to the next step.
- You can Unclaim a task to release it for others to work on.
LOGGING IN AND OUT
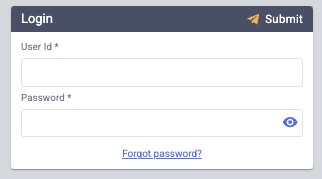
- Open your browser and go to the link provided by your team to log in.
-
Enter the credentials provided by your system administrator in the dialog and click Submit.
 If you are prompted, change your password. Each Actionabl client organization sets its own password rules, so consult with your system administrator for details on your requirements.
-
When you log in for the first time, you’ll be taken to the Task Master dashboard by default. It will look something like this:
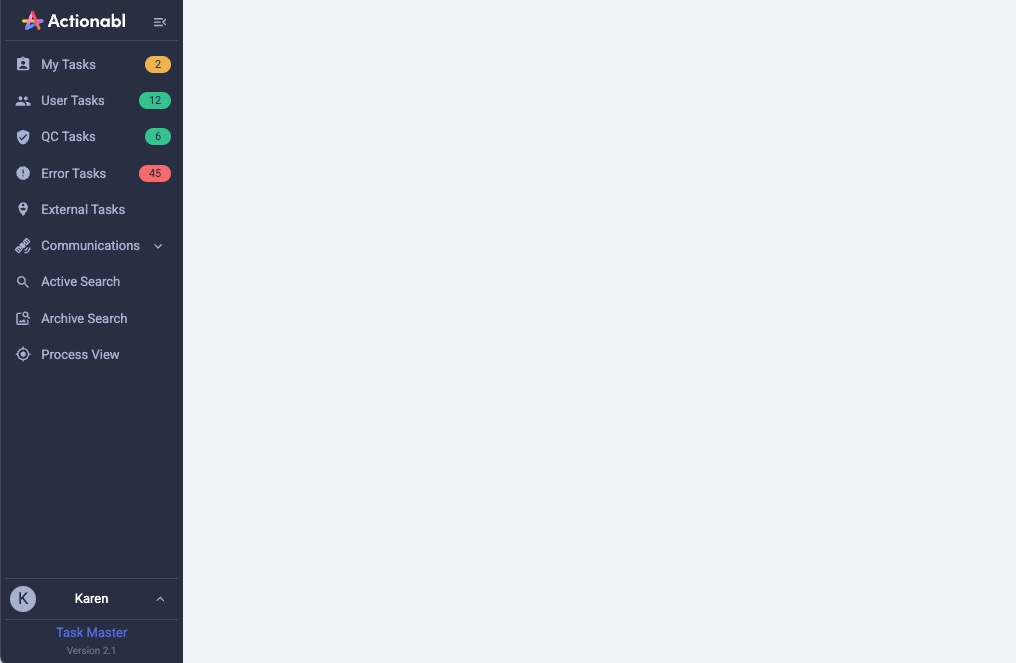
-
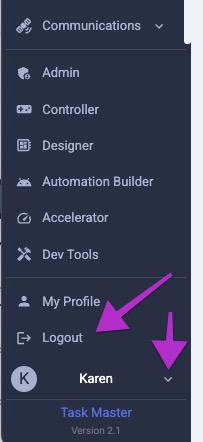
Click the down arrow next to your username at the bottom to see your personal account menu.
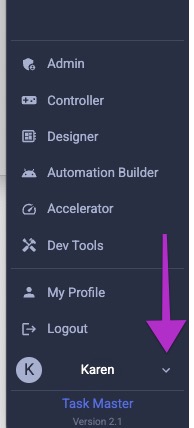
- Click My Profile to open your user profile.
MANAGING YOUR PROFILE
Your Actionabl user profile contains more than your username and password. It’s essential to your interaction with the system, workflows, and your team. Click the arrow next to your username, then select My Profile. Three tabs are available: Profile, Password, and Settings.The Profile Tab
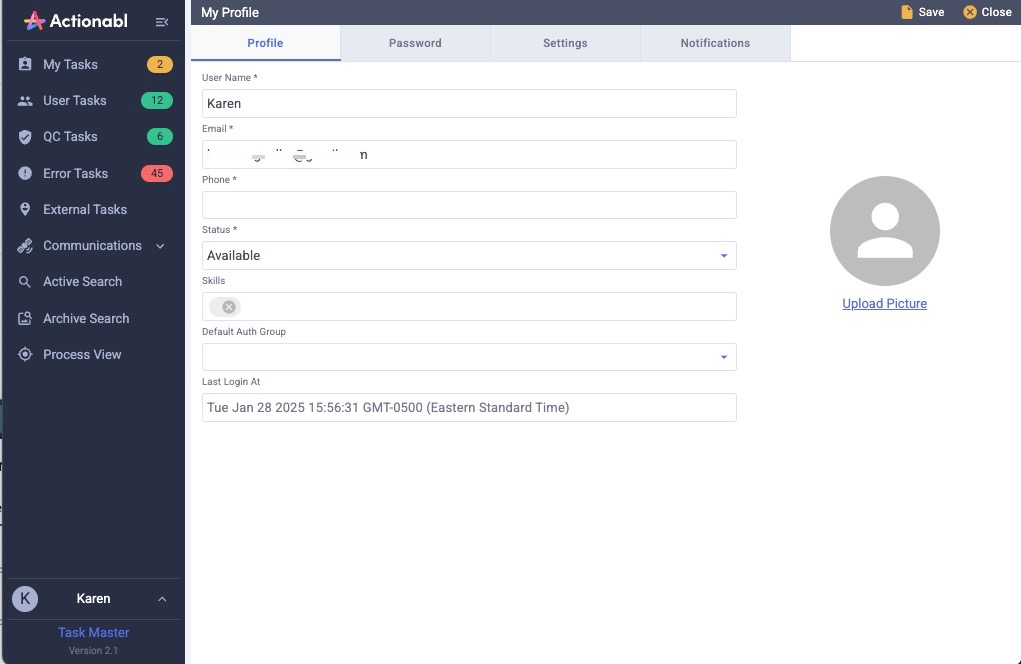
- User Name is the login name you use for the system. It must be unique, so use caution if attempting to change it.
- Email is the email address at which you receive notifications from the system. You can update this as you wish.
- Phone is an optional field where you can include a phone number that the system can use to send automated SMS or WhatsApp notifications for errors. If the process administrator has enabled that functionality, these notifications are sent.
- Status optionally sets your availability to receive automated task assignments if the process administrator enables auto-assign for this process. The system checks your group and this status to determine eligibility for the assignment.
- Skills - reserved for future functionality. Please do not enter anything in this field.
- Default Auth Group lists the dashboards that you are authorized to use. There is no need to set a default here; this function is deprecated and will be removed in a future release.
- Last Login On shows the date and time you logged into the system. You cannot change this.
- Upload Picture is where you can upload a profile picture. Recommended dimensions are 110px by 110px. File formats supported are: JPG and PNG.
Changing Your Password
- Click the Password tab at the top of the profile dialog.

- Enter your current password in the top box.
- Enter your new password in the following box, then re-enter it in the Confirm Password box. You will see an alert if the entries do not match.
- If you need to see the passwords entered, click the “eye” iconto the right of the input.
- To exit without making a change, click Close. Otherwise, click Save to proceed. You’ll see the message “Your password has been changed successfully” displayed at the bottom of your screen for a few seconds once the change is made.
Your Settings
The Settings tab shows technical settings relating to your user account. These are for information only. Do not make changes here unless instructed to do so by technical support or an administrator.Your Notifications
This tab records all notifications you’ve received from the system.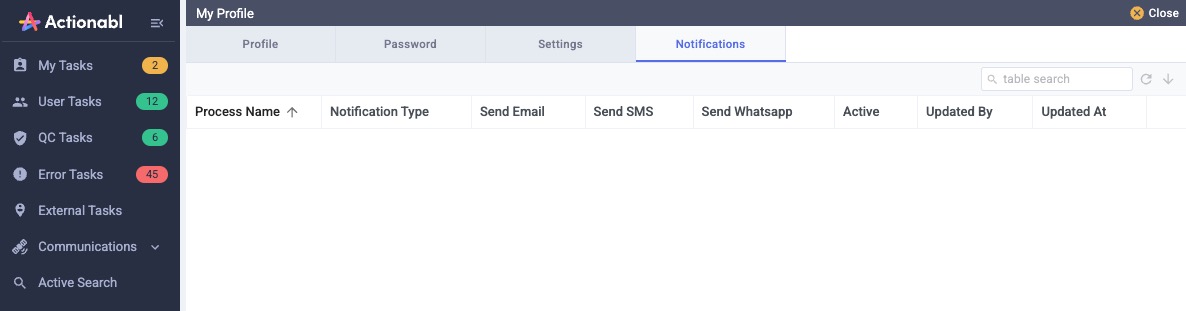
SEARCHING AND FILTERING
There are several different ways to search and filter tasks within Actionabl. Each has a different scope and will yield different results, so it’s important to understand how to select between them.- Searching is used when you know what you’re looking for. It’s especially useful if you have specific information, like a record ID or a person’s name.
- Filtering is better when you’re trying to narrow down a view to see a set of results that match your criteria, like seeing all invoices received within a range of dates or all tasks due next week.
Quick Search vs Full Search
There are two sets of search and filtering functions, and they each act a bit differently. On any list of task alerts, you’ll see a Search and a Filter icon at the top right of the list. These are the “Quick” options. On the dashboard’s menu, you’ll see Active Search and Archive Search. These are the “Full” search and filtering tools.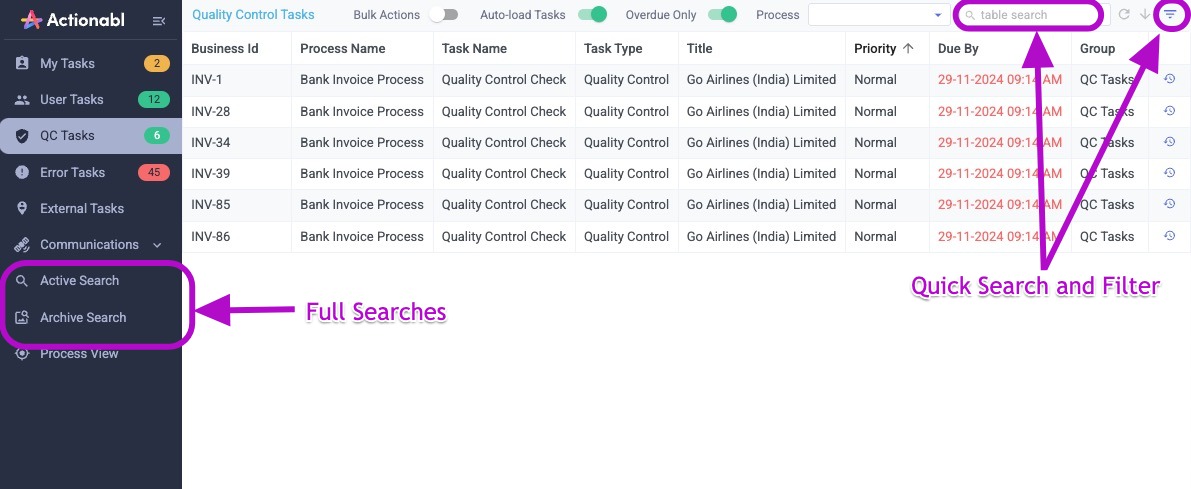 The scope of information searched by these tools differs.
| Quick Search and Filter | Full Search and Filter |
|---|---|
| Searches only the columns (fields) currently \ displayed on the list | Can search ALL columns in the record. |
Quick Search
When you are on any list of records, the search at the top right looks through all the records found on that list (even if it spans multiple pages) to find a match for the term in any of the fields displayed in the results. It finds the records instantly as you type.
Quick Filters
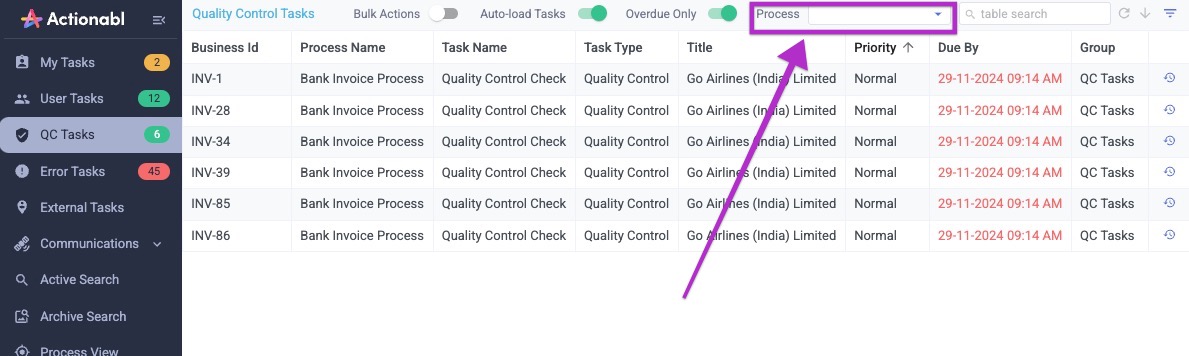
On any screen of records, there are two sets of filters available to you: Process and Results.- In the center top of the navigation is a Process Filter. This narrows the result set to items that are in the process selected.
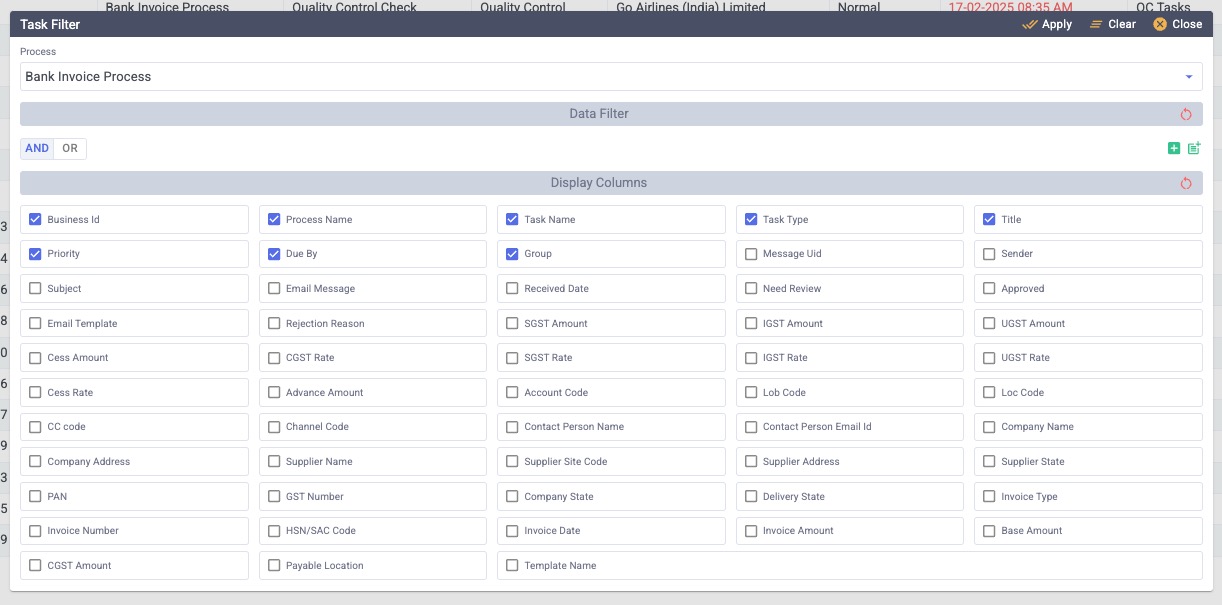
- The Result Filter is a powerful tool that enables you to select across other fields and criteria to narrow down your results.
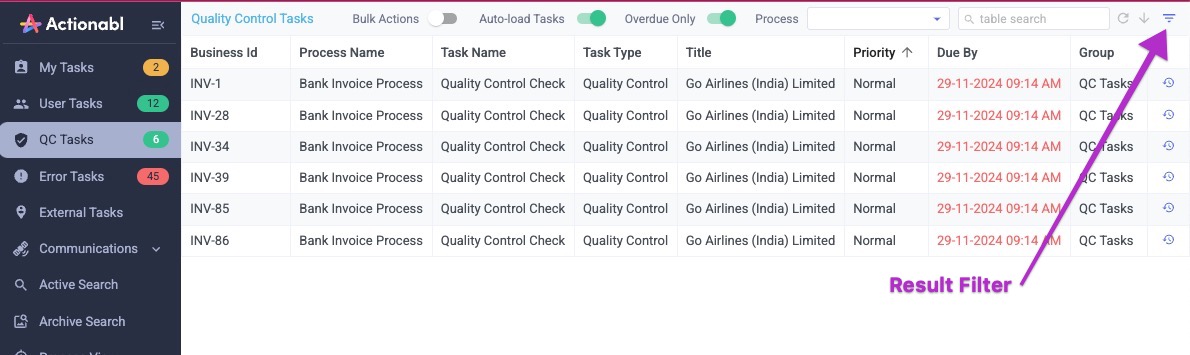
- Once you select a process in this filter, you’ll see a set of fields relating to that process, which you can use to build robust criteria for your results.

Full Searches and Filters
In the menu bar, you’ll see Active Search and Archive Search. These functions are identical in use; their results differ only in returning currently active records vs. older records that have been archived. Unlike Quick Search and Quick Filter, these search and filtering functions have access to all of the data stored for a particular record, even if that data is not displayed on the result list.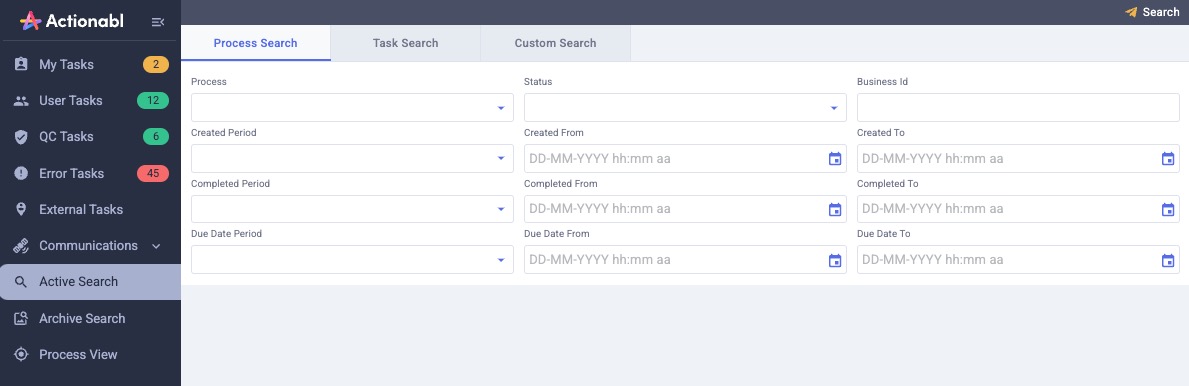 The tabs across the top specify the span of data to be searched: an entire process, a task, or a custom search.
NOTE: Only a custom search allows you to save the query in a folder for future use.