OVERVIEW
Actionabl.ai is a platform that automates your business processes and alerts users whenever human intervention is needed. This guide covers User Management Tasks usually performed by administrators or supervisory users, including:- Managing Assets - Assets are the granular tasks, items, dashboards, and resources within the system. They are the key to managing permissions throughout the system.
- Managing Groups and Departments - Groups and Departments are the ways we grant or restrict permissions to multiple users at a time, ensuring the integrity of the data in the system.
- Managing Users - Adding and deleting users and changing their permissions as their responsibilities change is a common task of supervisors and admins.
If you are a new user of Actionabl, you should review Getting Started with Actionabl to familiarize yourself with key concepts and terms used throughout this document.
- Task Management covers all aspects of the Task Manager dashboard, which includes:
- Process and Task concepts, organization, and management
- Process View basics
- Automation management, including processes, tasks, connectors, and rules
- Controller Guide covers the Controller dashboard, which is central to managing the flow of automated processes through the system and enables monitoring and reporting on the workflows being managed in Actionabl.
- Automation, Task, & Rule Administration covers the core of setting up and managing the tasks, automations, connectors, and rules that make up the process flows.
- Process Administration Guide is used to learn how to create, edit, and manage processes and all of their components. This includes the creation of tasks, connectors, data fields, data sources, and more.
UNDERSTANDING USER MANAGEMENT
Supervisory employees may have permissions in the Actionabl system to manage the users in their organization. This is done on the Admin dashboard in your account. User permissions include:- Adding, editing, or deactivating a user
- Assigning or removing a user to a user group or assigning them to a department
- Editing information for a user group or department, such as contact information and naming
- Changing the menus, actions, and portals (collectively called “assets”) available to a user group
- Deactivating a user group or department
Note: Creating a new user group or department is available only to users with Super Auth group permissions.
Note: You can edit all of the information for a user that you have created. For users created by someone else, you can change the User Group assignments. System-created users (which have a “last-updated by” user of “Actionabl”) cannot be changed.
Accessing the Admin Dashboard
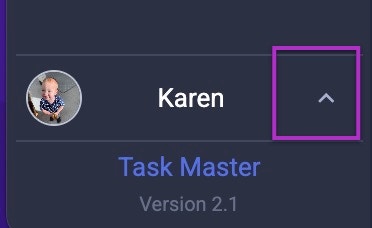
User functions are found under “Access Control” on the Admin dashboard in your account.- Click the up-arrow ^ next to your name in the bottom left corner of the screen. This will open your Profile menu.\
- Select Admin at the top of that menu. This is how you move between the different dashboards available to your user. (Only the dashboards that you have permission to use are shown on your list.)
- Click Admin Controls, then select Access Control to manage users and groups.\
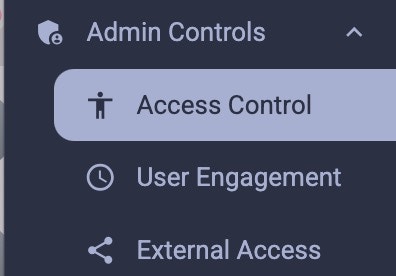
- When you open Access Control, you see four tabs across the top: User, Group, Department, and Asset.\

- User: Add, edit, activate, and deactivate user accounts in the system. This is the default tab when you click Access Control.
- Group: You can edit or deactivate a group and assign users to it, which allows for cross-department permissions or process routing. For Authorization groups, this is also where you specify which assets the group can access.
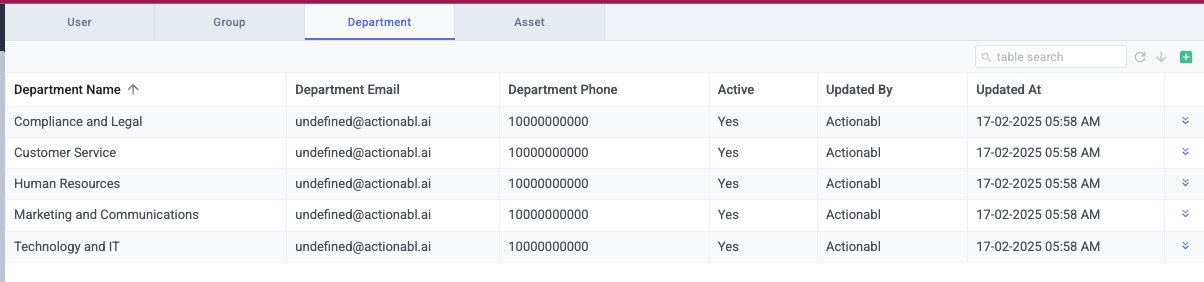
- Department: Create or edit a department, assign users, and set a department as active or inactive.
- Asset: Create a new asset and manage the groups that can access the asset. Assets can be actions, menus, processes, or portals.
Understanding Groups, Departments, and Users
When putting together the access plan for your business, we build it based on a set of assets, which are then put into groups and departments. Users have groups and (sometimes) departments assigned to them. This looks something like this: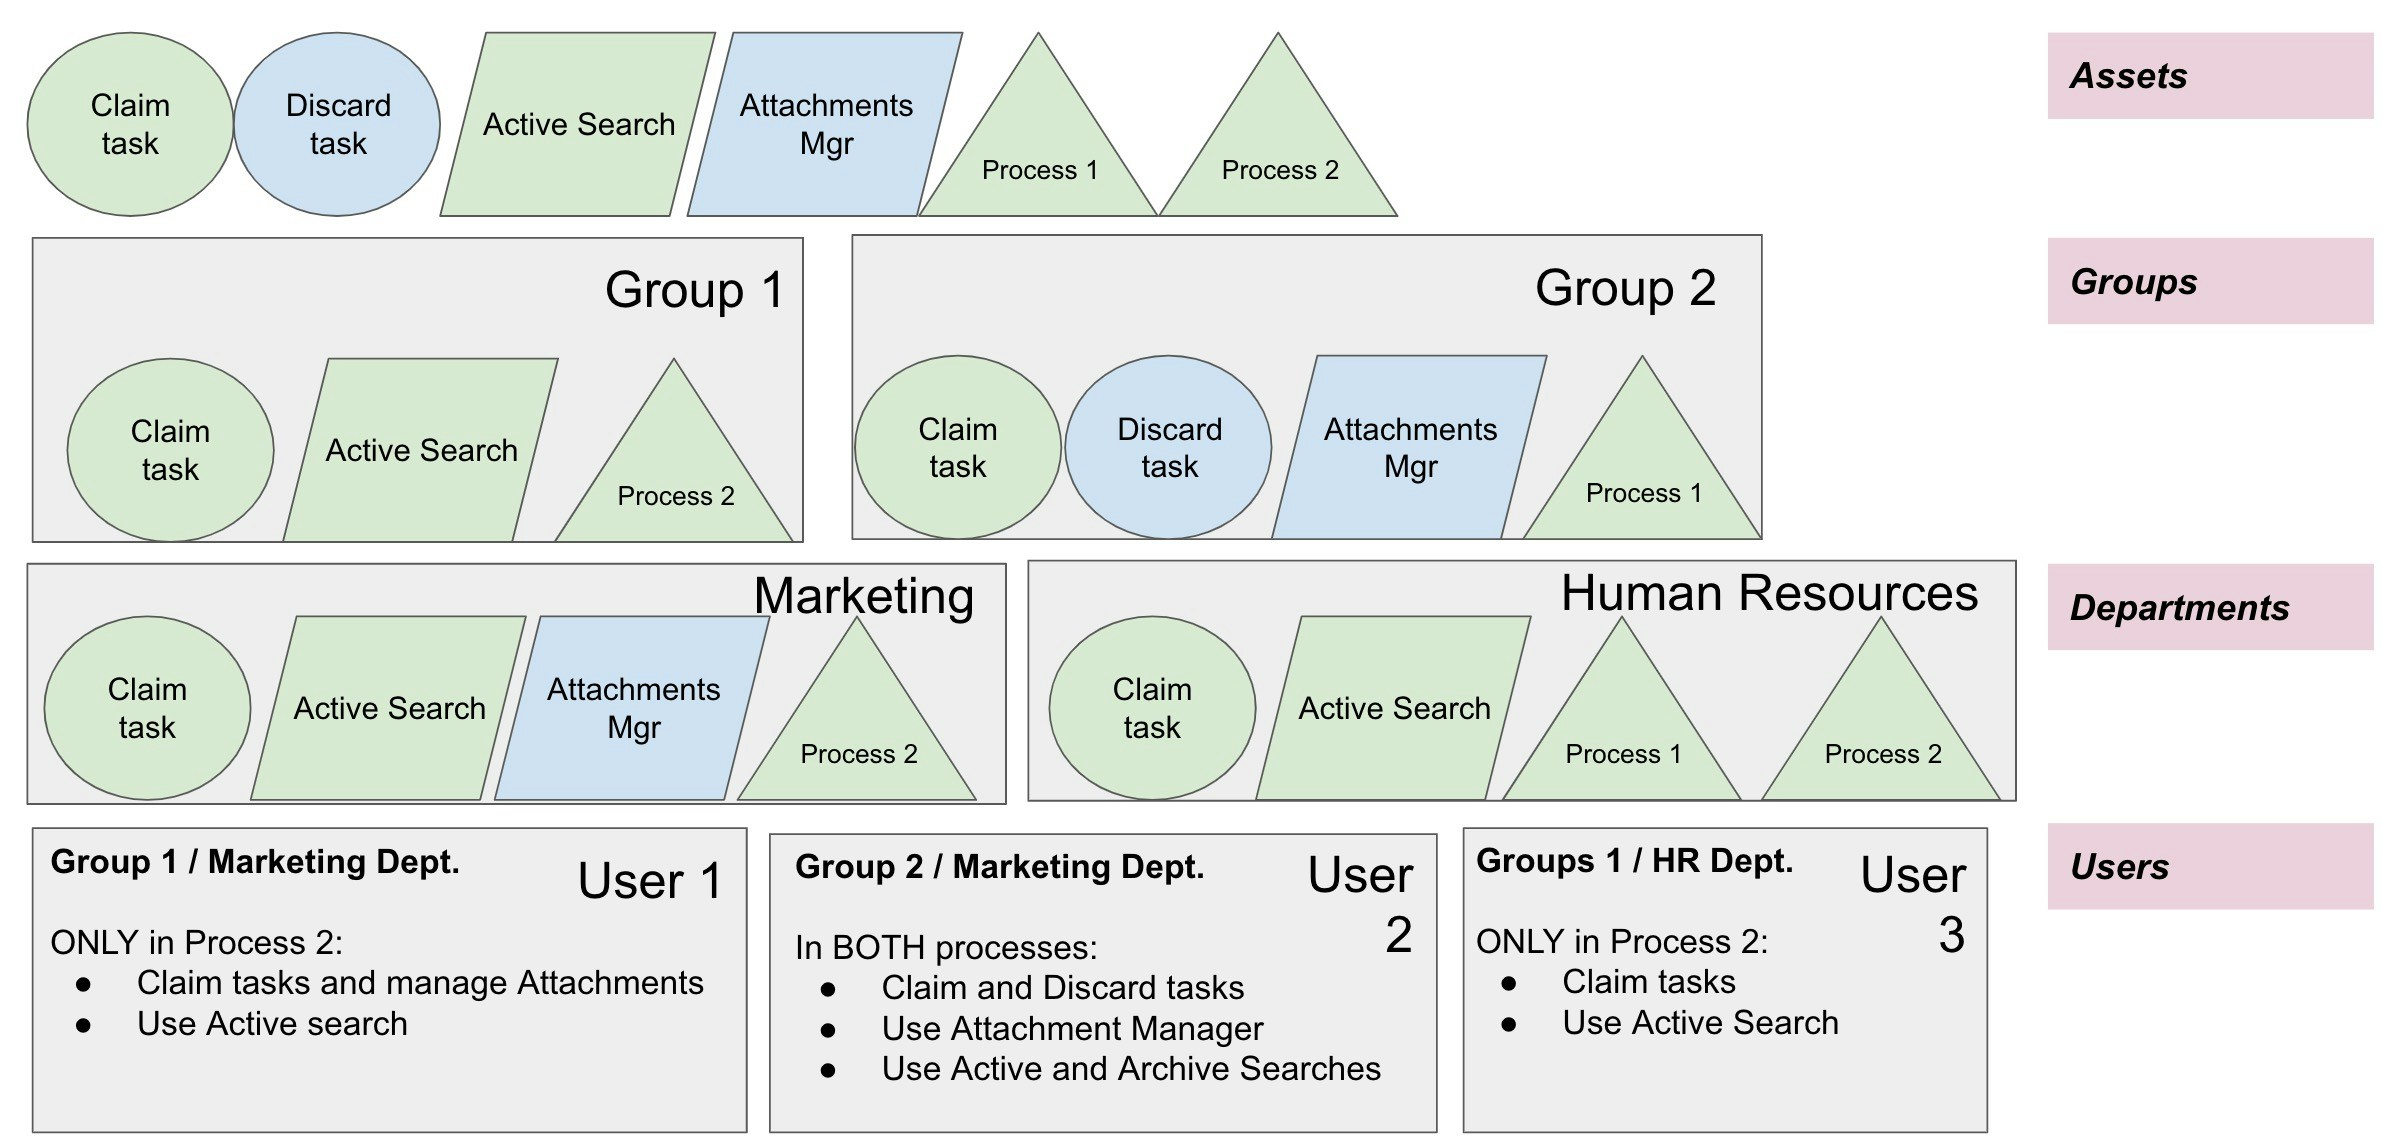
- User 1 has access only in Process 2, where they have fairly restrictive (green) user tasks (searching and claiming tasks). Their Marketing department role also gives them a supervisory task (managing attachments).
- User 2 has access in both processes. They have a (blue) supervisory task (managing attachments) and can also claim and search.
- User 3 only can claim and search, but they can do it in both processes
Understanding Assets
Assets are the actions, menus, processes, portals, and spaces within the system. The Assets menu enables you to assign or restrict specific assets to specify what a User Group’s members can do.
MANAGING GROUPS
There are three types of Groups: Authorization and Task.- Authorization groups allow a user to access a dashboard in the system, such as TaskMaster or Controller. A user account must have at least one of these groups to log in.
- Communication groups determine whether the user can receive notifications and/or see communications via Threads.
- Task groups specify the tasks and modules that the user can access.
| Predefined Group | Type | Permissions |
|---|---|---|
| Accelerator | Authorization | Access to Accelerator dashboard |
| Admin | Authorization | Full Access to all dashboards in Actionabl. Cannot edit or create Groups and Assets. |
| Automation Builder | Authorization | Access to the Automation Builder dashboard and tools |
| Controller | Authorization | Access to Controller dashboard |
| Customer Service | Authorization | Access to external user and customer information and can perform certain customer-focused actions (usually through buttons in the interface) like sending emails |
| Designer | Authorization | Access to Accelerator, Automation Builder, and Designer dashboards |
| Dev Tools | Authorization | Access to Dev Tools dashboard and other development tools accessible only via URL |
| Super Auth | Authorization | Full Access to all dashboards in Actionabl, plus permission to create and edit Groups and Assets. |
| TaskMaster | Authorization | Access to the TaskMaster dashboard |
| Automated Tasks | Task | Access to automated task items |
| Default | Task | Access to My Tasks module and items |
| Error | Task | Access to Error Tasks module and items |
| QC | Task | Access to QC Tasks module and items |
| User | Task | Access to User Tasks module and items |
Viewing A Group’s Assigned Assets
Before assigning users to a group, it’s essential to review the available assets to ensure they are appropriate for the user’s responsibilities.- Click the expander icon next to the group to open its details.\

- Click Group Assets. The popup showing all assets appears with the assets available to the group checked and listed at the top.\
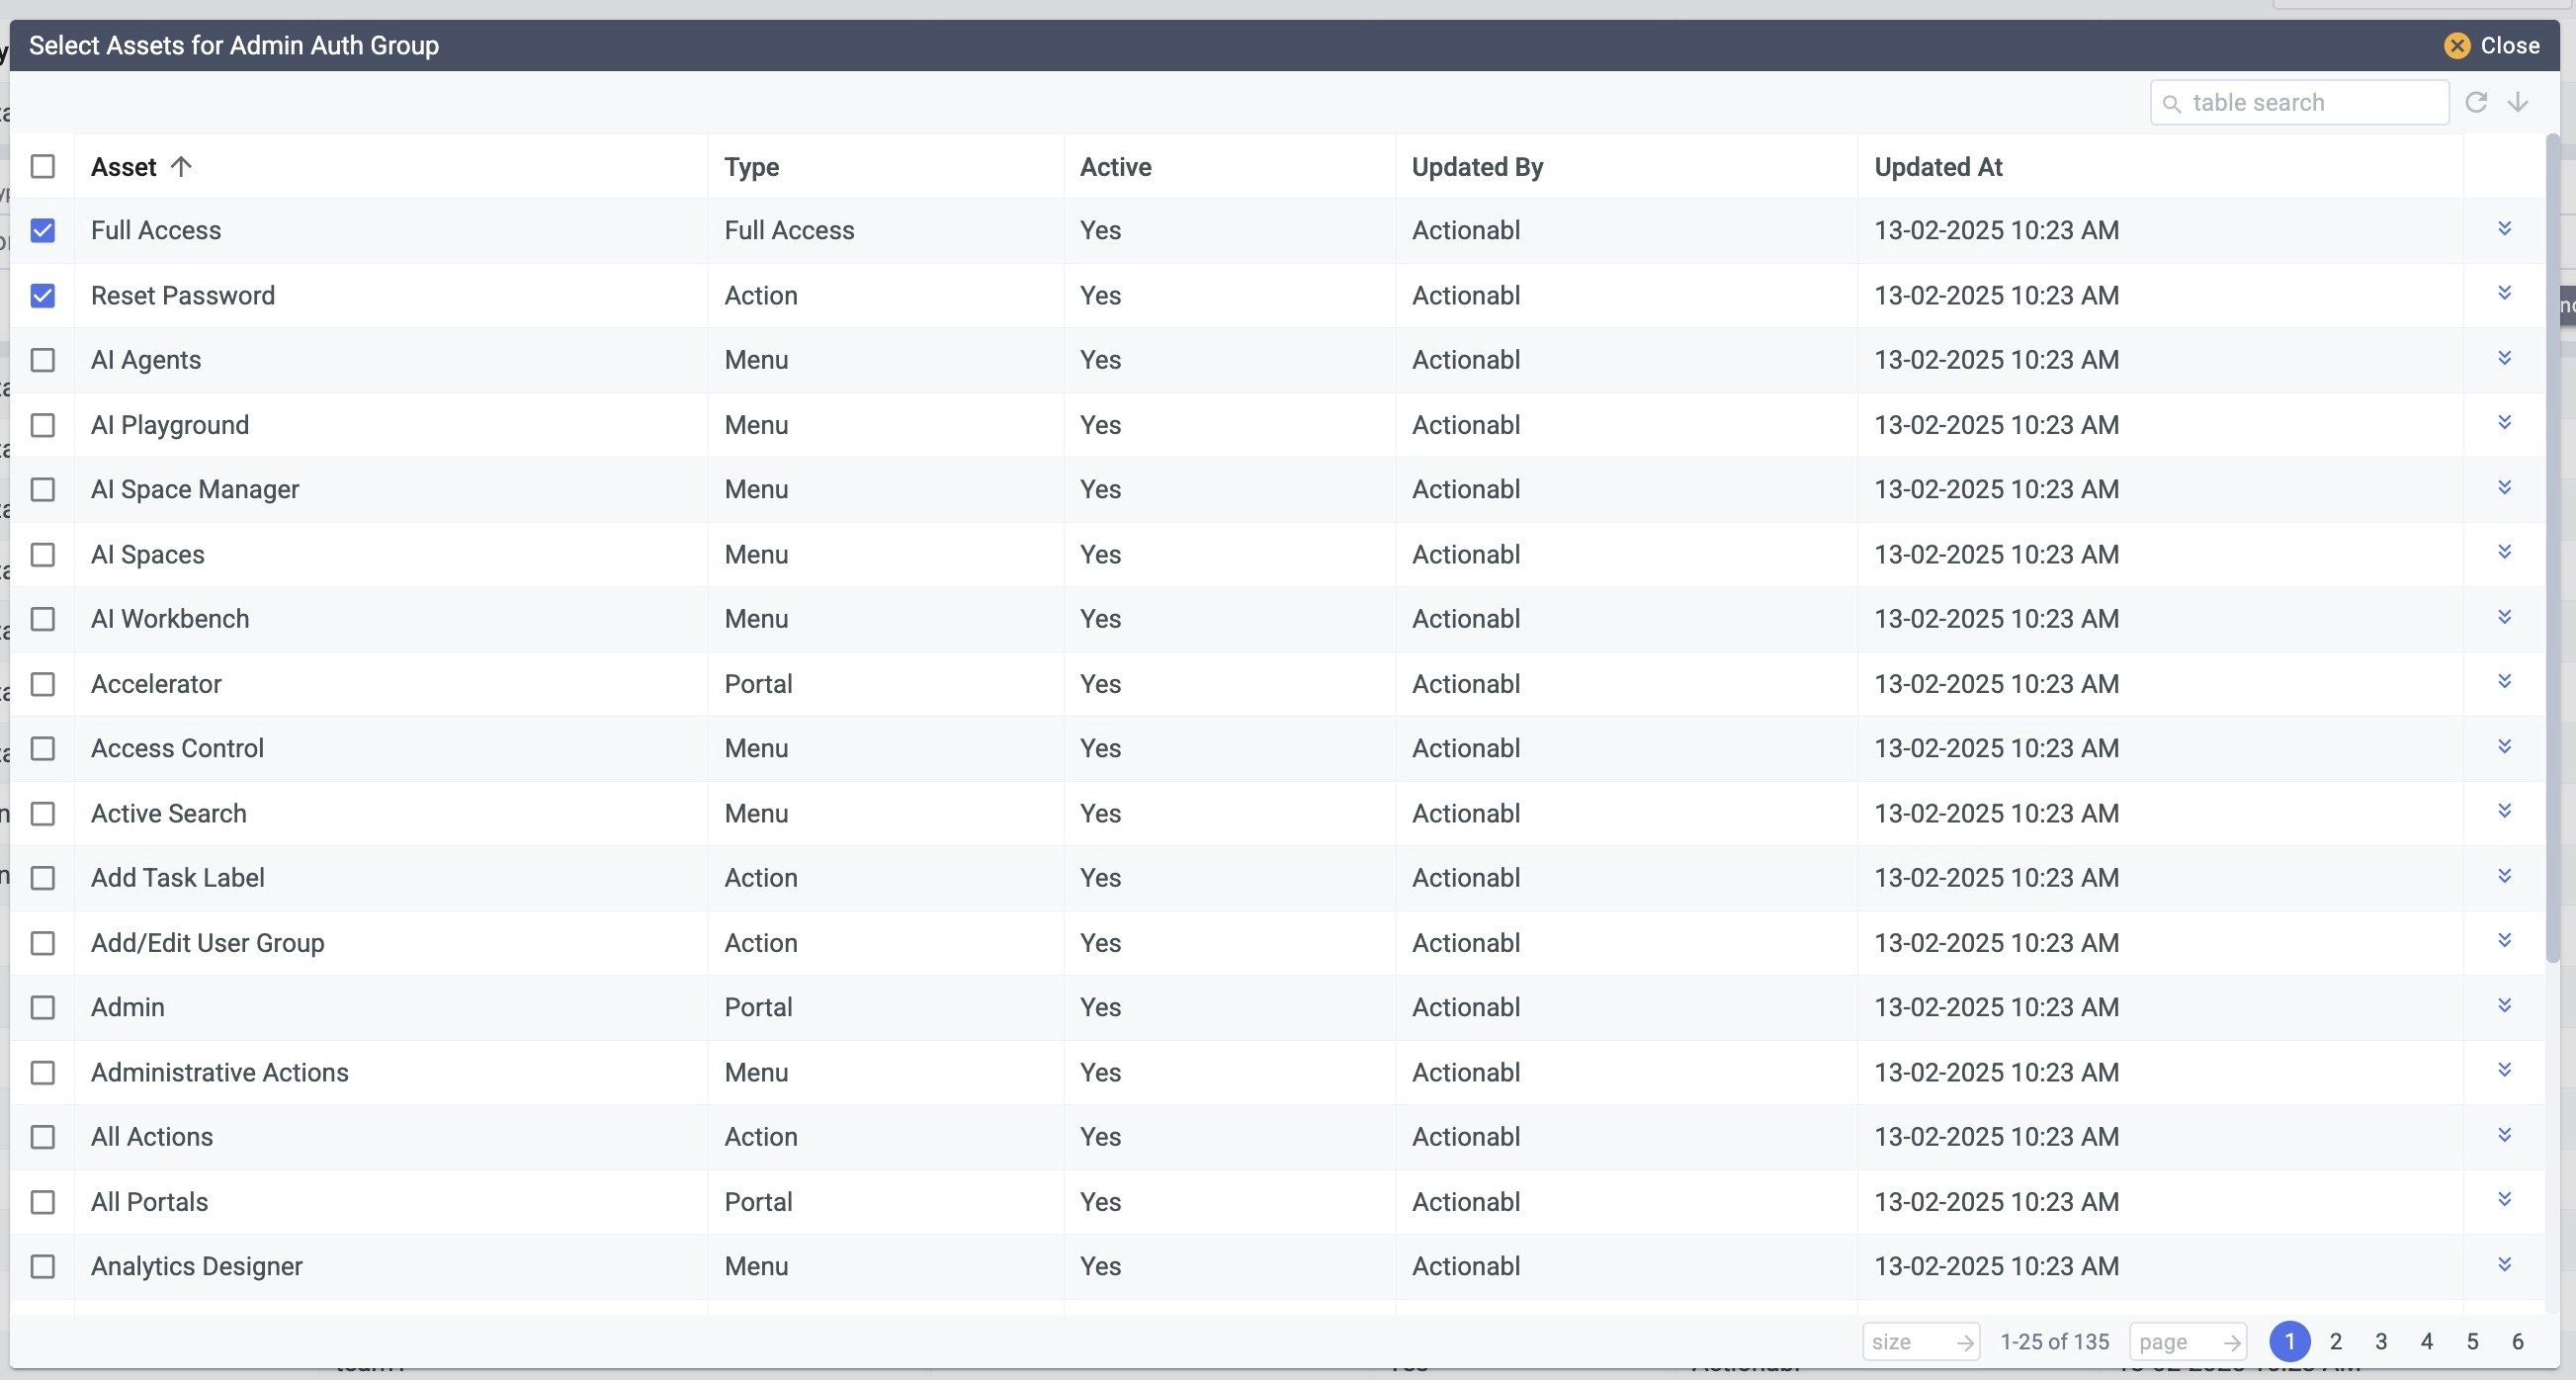
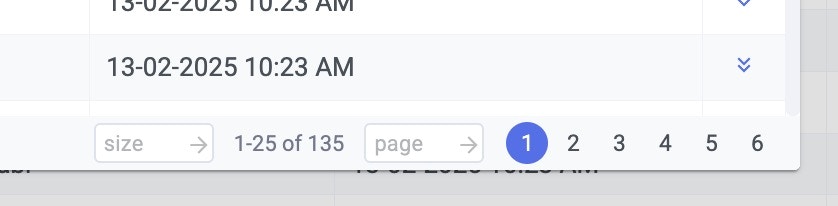
- At the bottom right of the popup is navigation to multiple pages of results, if needed.\
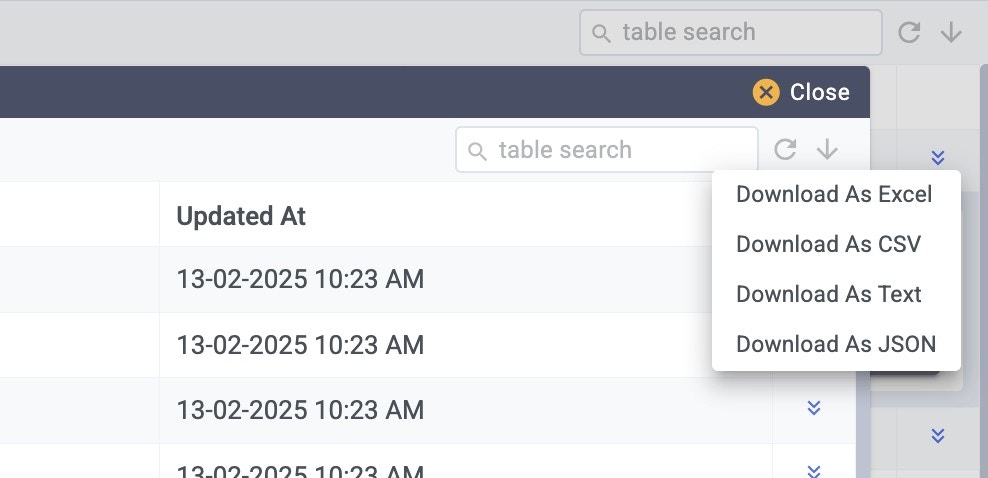
- On the top right, you can search the list or download it in Excel, CSV, Text, or JSON format.\
- Click Close to return to the list of groups without saving any changes made on this list.
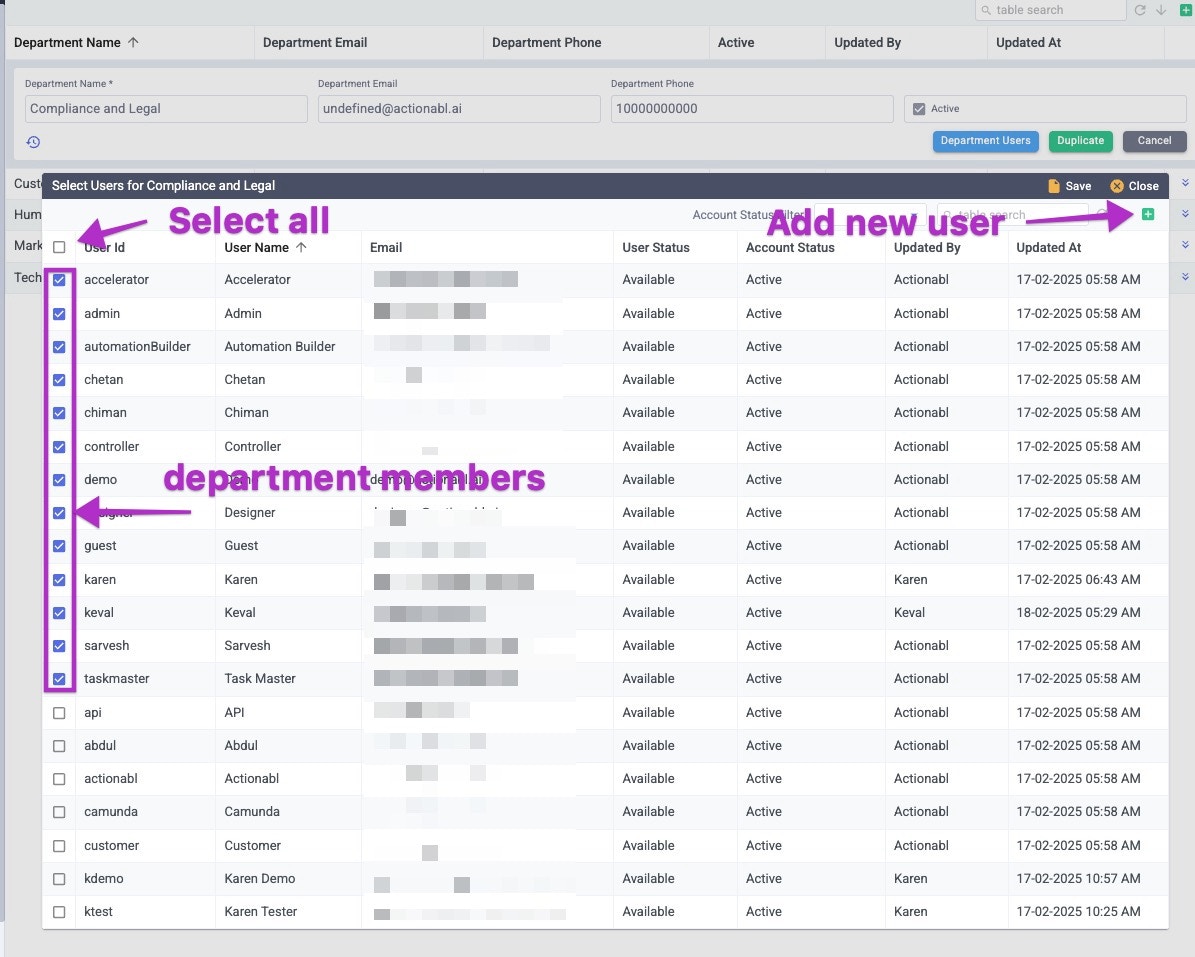
Changing the Users Assigned To a Group
You can add or remove users from a group by using the Group Users function.-
Click the expander icon next to the group to open its details.\
-
Click Group Users to open the list of all system users. For convenience, all users currently assigned to this group are checked and listed at the top of the list.\
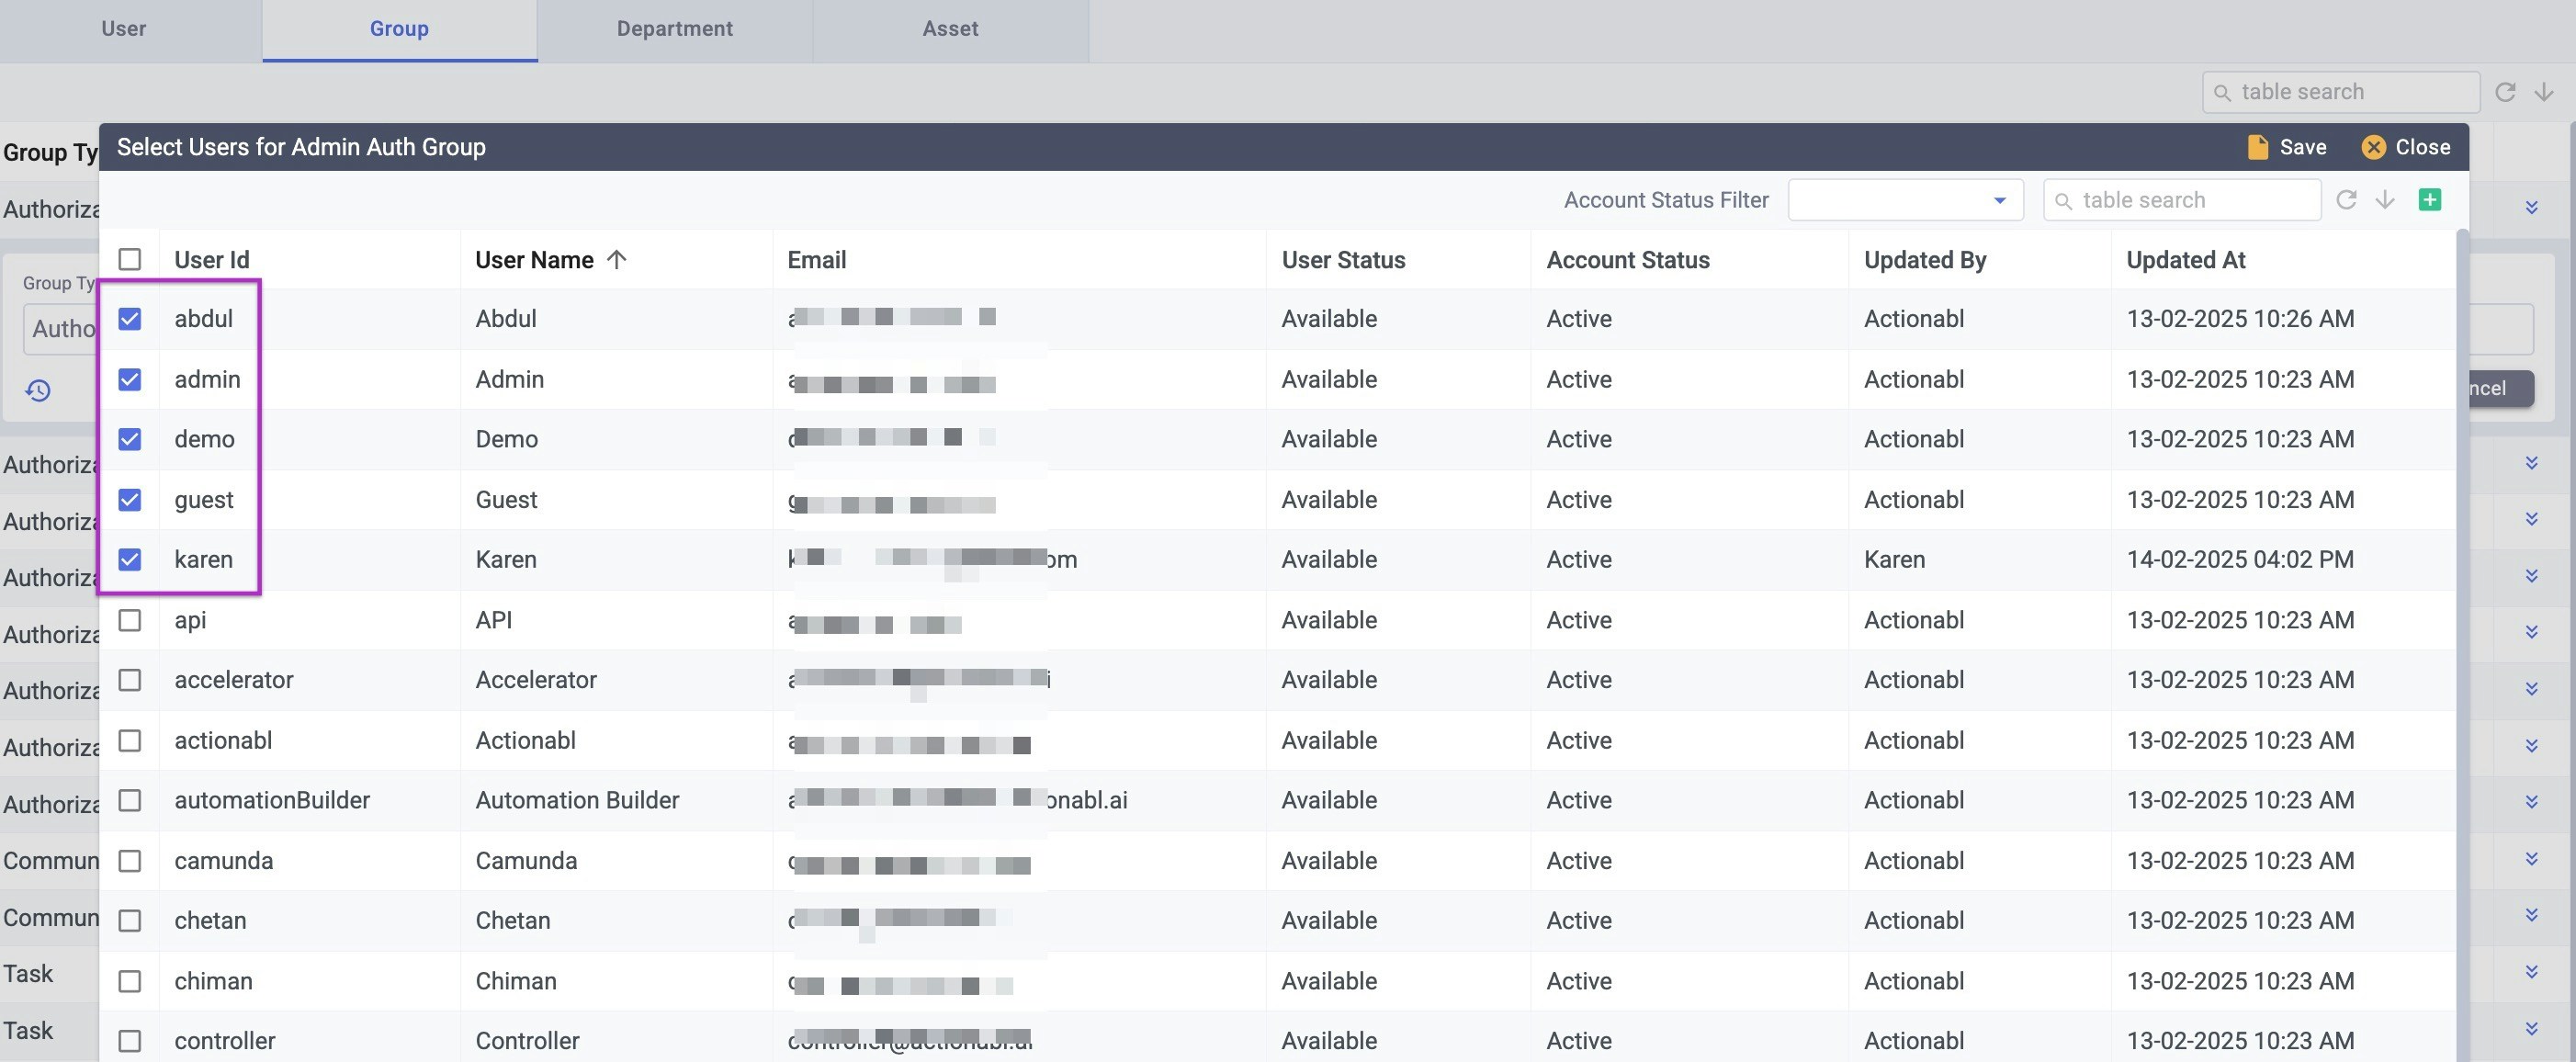
- Check to add or un-check to remove users from this group.
-
If the user you need to add is not yet in the system:
- Click the green plus button at the top right to add them to the list.\

- Click Save when you have added their information, including their password.
- The new user is now shown at the top of the list. Click the checkbox to add them to the group.
- Click the green plus button at the top right to add them to the list.\
- Click Save at the top right of the popup to save the changes to the group.
MANAGING DEPARTMENTS
Departments are groups of users who share similar sets of responsibilities and interests, such as customer support, human resources, or operations. They are likely to need access to the same processes and items, but individuals may also need different accesses. For example:- All members of the auditing department have full access to quality control tasks.
- Members of the auditing department who are in the Supervisors group also have access to the user management tasks and options in the system.


ADDING, EDITING, & DEACTIVATING USERS
Duplicating A User
This function makes an exact copy of an existing user and copies their permissions, groups, or departments over.- Click the expand icon to the right of the existing user you wish to duplicate. This opens their details.\

- Click the green Duplicate button. The original user record closes on the list and a new copy is open immediately below it. The original is now listed just above the gray box and all of its information has been copied into the new user in the gray box, which now also shows the Password field.\

- Change the information in the User ID, User Name, and Email fields. Also update the phone fields, if necessary.\
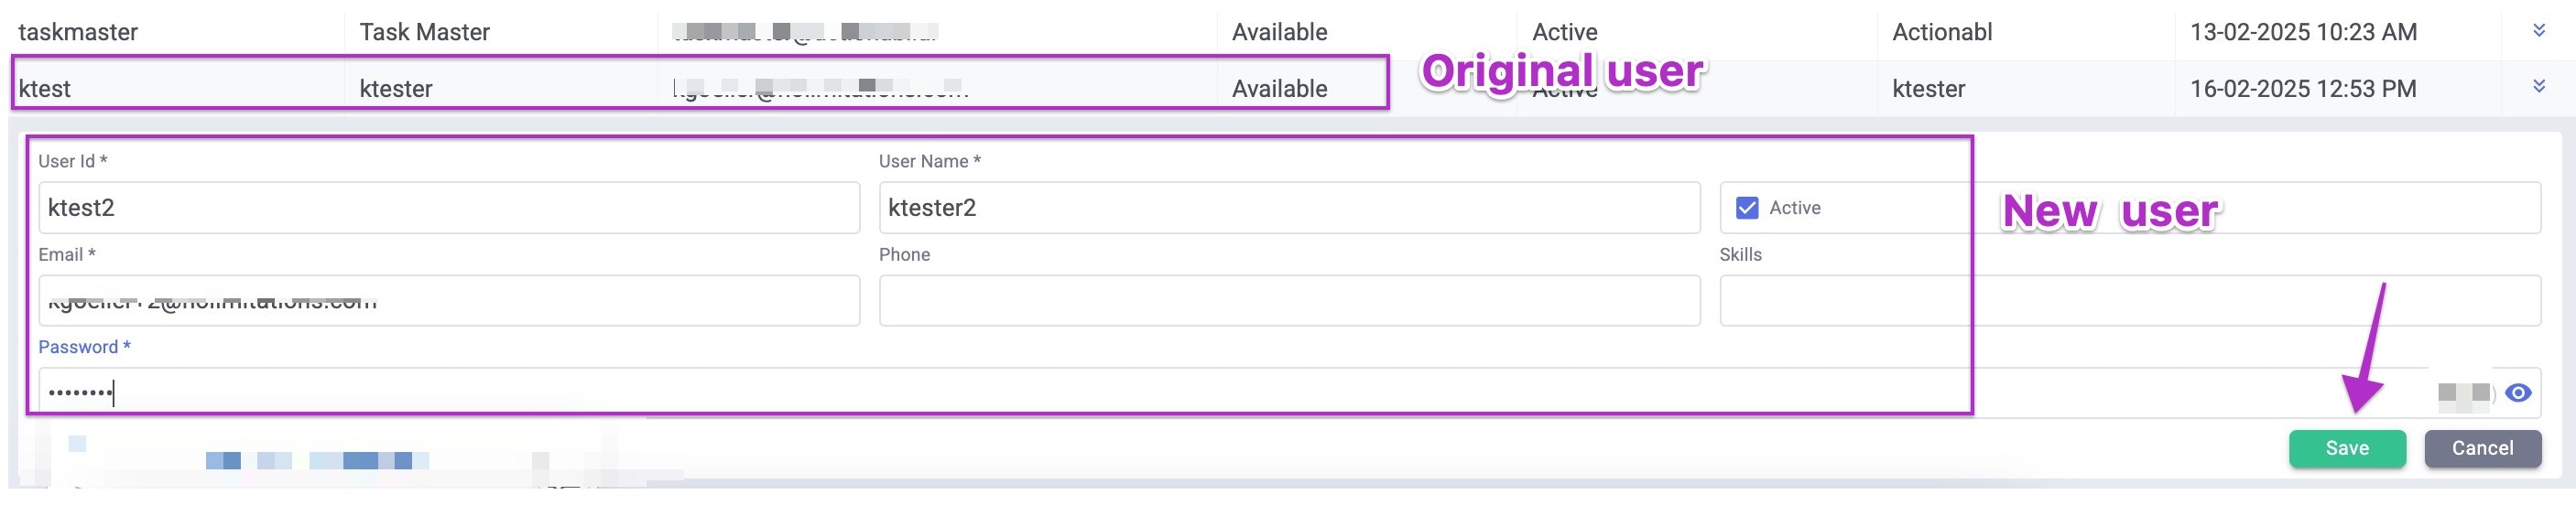
- Enter a temporary password for the new user (they will be required to change it the first time they log in).
- If the new user is to be active immediately, make sure Active is clicked.
- Click Save to create the new user account. You’ll now see all of this user’s setting options.\

- The new user is now listed and can log in with the same permissions and groups as the one they were copied from.
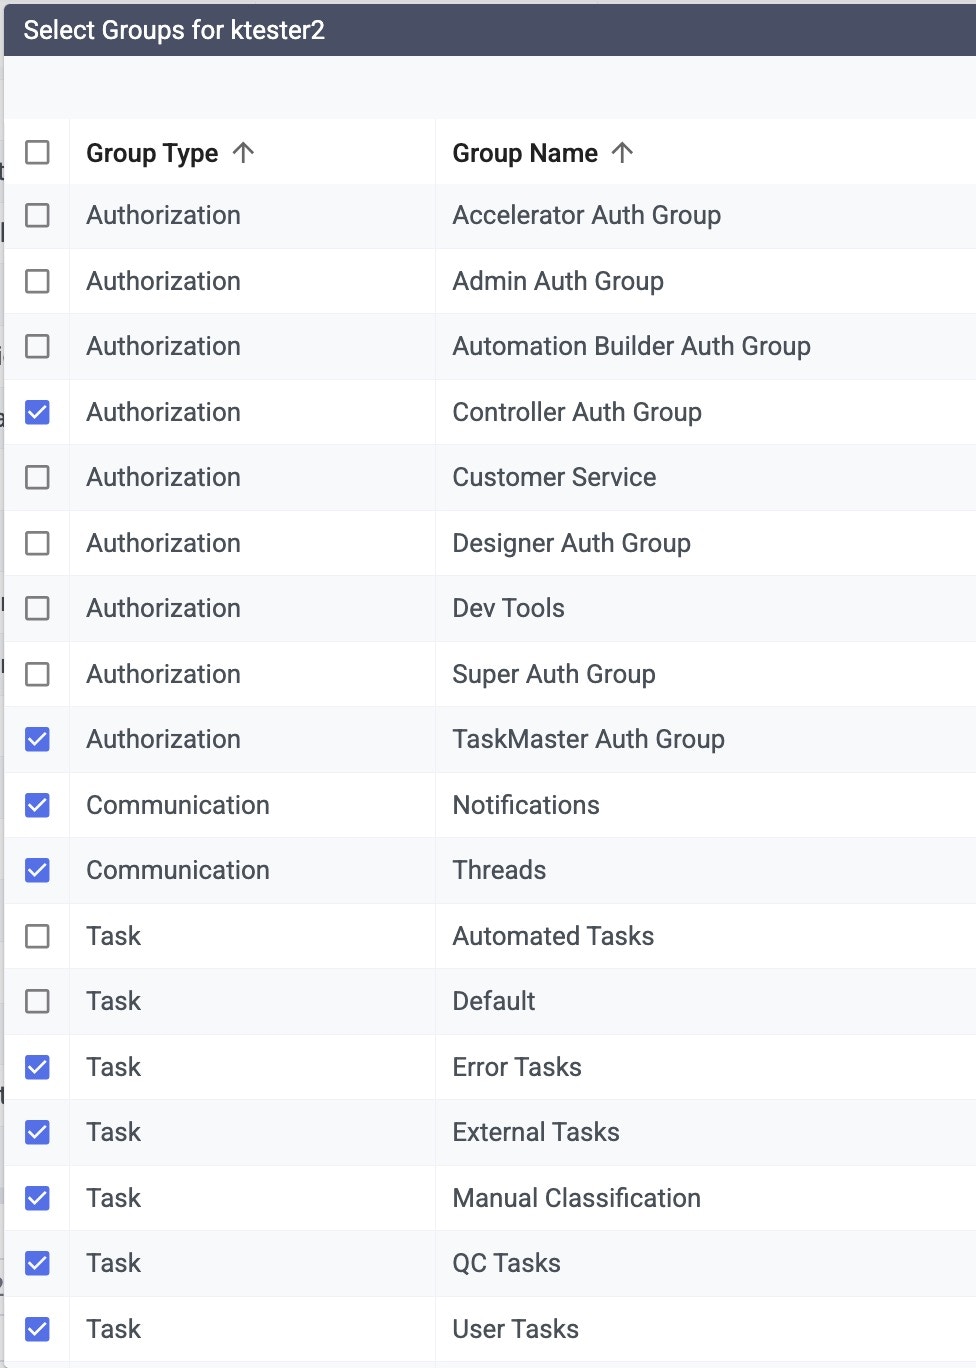
- To change the new user’s permissions, start by clicking User Groups and assign them to all of the groups they need. Consult your system administrator, human resources, and/or their manager to determine the appropriate settings for them. Click Save after making your selections.
- Authorization: These groups determine which dashboards the user can see.
NOTE: Users must have at least one “Authorization” group to allow them to log in. Otherwise, they will receive an error message:
- Communication: These groups determine whether the user can receive notifications and/or see communications via Threads.
- Task: This is the most granular level of group permissions. It specifies the types of tasks that the user can see and engage with. If you do not select tasks, you will see the dashboard, but it will be empty.
This is an example of a typical “routine business user” setting:
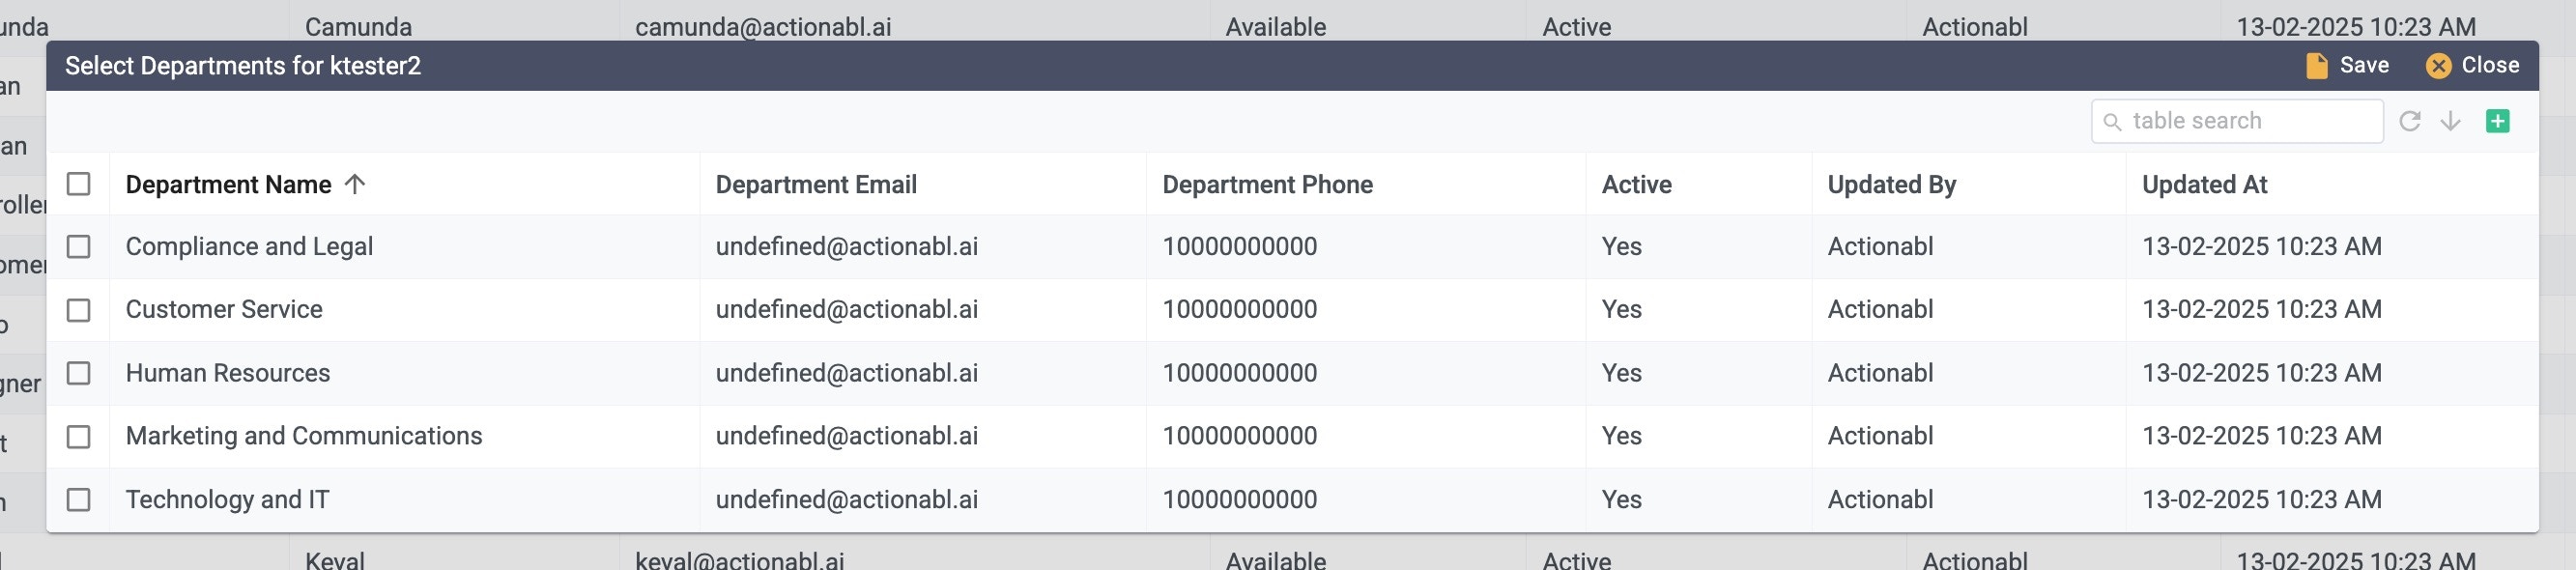
- Click on User Departments to adjust the user’s assignment to a Department. As with Groups, consult with the appropriate staff to determine which one(s) to assign. Make sure to click Save after making your selections.\
- After adding the groups and departments, click the gray CANCEL button to return to the list of users. The new user appears just under the original one.

- Click the green plus button at the top right of the screen to open the new user form.\

- Fill in a User ID, which becomes the user’s login. This must:
- be unique
- contain only alphanumeric characters, plus underscore (_) or dash (-).
- cannot contain spaces.
- The user ID cannot be changed once the record is saved.
- Enter the user’s name in the User Name field. This is the name displayed on their Profile and anywhere they are listed in the data. It is not the user id they use to log in, so it can be changed at any time by the user or an administrator.
- If the new user is to be active immediately, make sure Active is clicked.
- Enter the email address at which the user should receive system notifications.
- Enter their phone number. The system will use this number to send SMS notifications. The phone number can be entered using +, ( ), and -, but these are not required. Long-form phone numbers like +1 (800) 555-5555 can be used.
- Enter a temporary password for the new user (they will be required to change it the first time they log in).
- Leave the Skills field empty. This is reserved for future functionality.
- Click Save to create the new user account. You’ll now see all of the options to change this user’s settings.\

- Authorization: These groups determine which dashboards the user can see.
NOTE: Users must have at least one “Authorization” group to allow them to log in. Otherwise, they will receive an error message:\
- Communication: These groups determine whether the user can receive notifications and/or see communications via Threads.
- Task: This is the most granular level of group permissions. It specifies the types of tasks that the user can see and engage with. If you do not select tasks, you will see the dashboard, but it will be empty.
This is an example of a typical “routine business user” setting:
- Click on User Departments and assign the user to one or more departments. As with Groups, consult with the appropriate staff to determine which one(s) to assign. Make sure to click Save after making your selections.\
- After adding the groups and departments and saving them in the popup, click the gray CANCEL button to return to the list of users. The new user will appear just under the original one.\
Editing A User
You can edit a user’s information if you created the user or are a member of the Super Auth group.| Fields That Can Be Edited | Supervisor | Super Auth User |
|---|---|---|
| User ID | ☑️ | ☑️ |
| User Name | ☑️ | ☑️ |
| Active flag | ☑️ | ☑️ |
| ☑️ | ☑️ | |
| Phone | ☑️ | ☑️ |
| Skills | ☑️ | ☑️ |
| Password | ❌ | ☑️ |
- Click on the expand icon next to the user you want to edit.
- You will see all of the fields that are available to you. Click the purple Edit button to make the fields editable.\
- Make the changes you want, then click the green Save button.\

- Make any needed changes to their user groups, department, or password, then click CANCEL to close their details. The changes are now saved and will appear wherever this user’s information is displayed in the system.